While teachers enter an empty, calm classroom, it only stays like that for a short time! As students enter, the classroom has tons of love, energy, and excitement! However, this also brings on a bit of a mess. Between supplies on the floor and papers sitting all around, maintaining organization in the classroom is tough! Luckily, these top 20 tips for classroom organization will be sure to help!
Importance of Organization
Some teachers find organization easy, while others struggle in this area. However, many teachers are overwhelmed with how much there is to do each day that no one FEELS very organized. Luckily, simple tips to stay organized can make your day go smoothly!
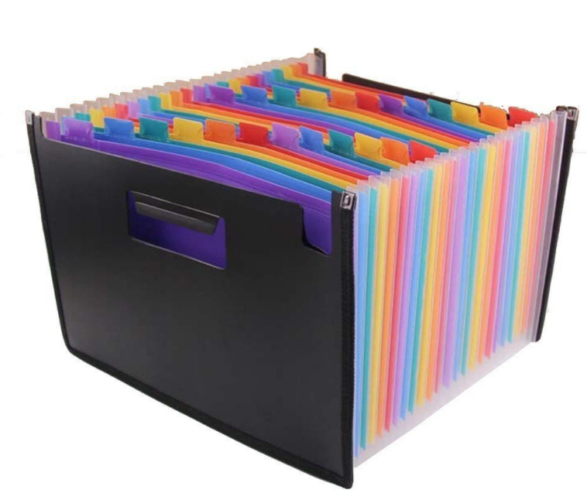
1. Accordion Folders
These cardboard folders are helpful in so many different ways! For example, they can hold finished work, unfinished work, and activities for early finishers. Additionally, they can hold student samples for parent-teacher conferences, keep colored paper organized, and hold extra copies for absent students. They can even hold sample artwork and answer keys. This simple folder can help in so many ways!
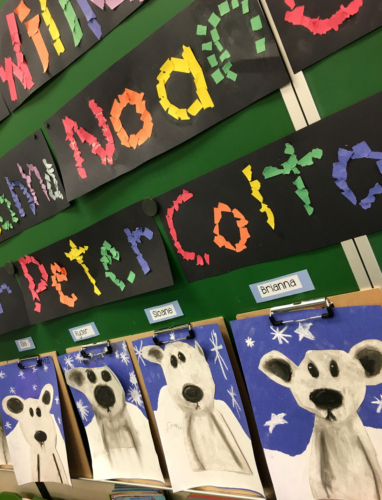
2. Student Clipboards
Every student in my classroom has their own labeled clipboard. We line them up for extra organization along the bottom of the board. Whenever we work on essential tasks, students hand their work in by attaching it to the clipboard. This way, it is easy to see whose paper is missing or if a student did not put their name on the paper. Similarly, they also hold artwork for beautiful displays! Students can even use the clipboards when they are moving around the classroom.
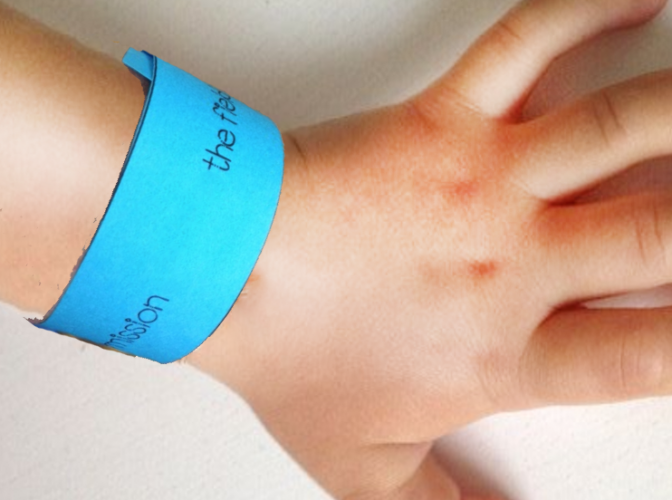
3. Reminder Bracelets
Teachers always have messages to send home. However, contacting each parent would take hours, and notes don’t always make it home. So, I created reminder bracelets! I quickly type up a sentence about the reminder, copy it 25 times, and print it out. Then, a student cuts the strips apart and hands them out. Students then glue them around their wrists and make a bracelet. Honestly, this is such an effective way to send home reminder notes. It works so much better than paper notes and emails!
4. Teacher Helpers for Marking
Students love to help! So, this tip is an awesome way to maintain organization in the classroom! The first few students who finish a math sheet receive the answer key to mark their own work. They are then allowed to mark other students’ work as they finish. Then, those students can then use their marked papers to mark the next wave of student finishers. Soon, everyone’s work is complete and marked. If there are no papers left to mark, those students walk around to see if they can assist students still struggling with finishing. Students are completely independent for the math period, and the conversations I hear are on-task and meaningful.
Just remember that this procedure isn’t appropriate for all tasks. However, it is great for simple practice worksheets. Best of all, students gain so much excitement over helping each other.
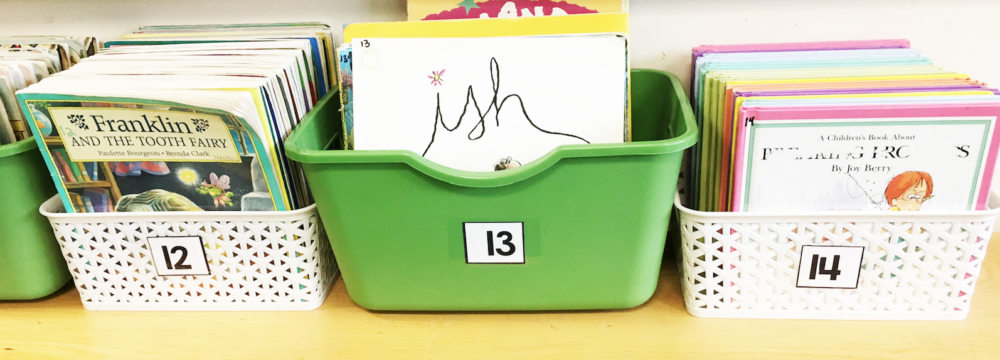
5. Student Numbers
There are so many ways to use student numbers. To get started, just assign each student one number. I start with the first student on my roster as one and progress from there. Then, I use these numbers to line students up in different formats, set up groups with odd and even, pair students up, and dismiss them from the carpet. I even organize items, such as our books, by number. So, students straighten the bin with their number. This strategy is such a helpful way to quickly move students around the classroom!
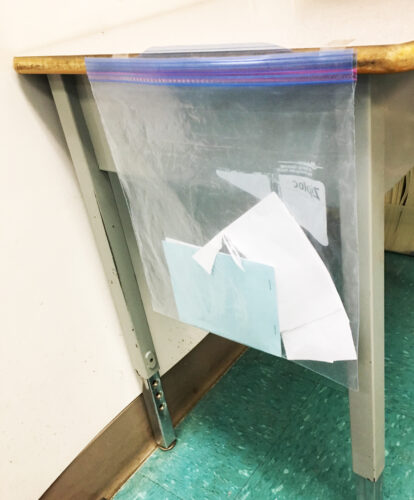
6. Ziplock Bags
Tape a large ziplock bag on the side of students’ desks or tables. When students have to clean up, they can slip any unfinished work into the bag for later. This is especially helpful when there are small pieces used for interactive notebooks or artwork. I can see at a glance if there is work for any particular student to finish. Additionally, I’ll remind them to empty their bag of unfinished work before choosing another activity.
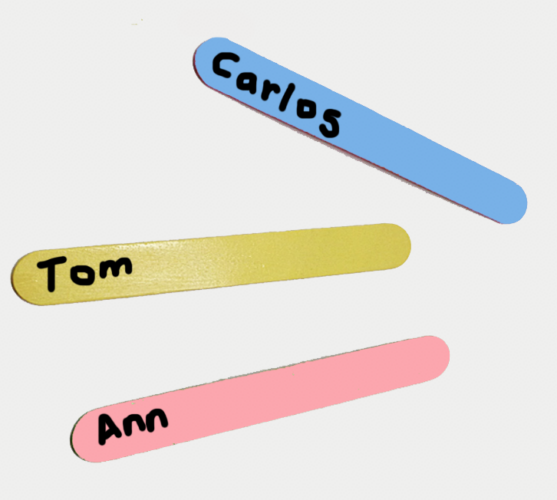
7. Craft Sticks
Honestly, it is hard to make sure I call on every student equally. However, by writing student names on a set of craft sticks, I can quickly and easily know everyone participates! Students who do not want to participate can just say “pass,” and I pull out a new stick. You can even use these when playing a game. For example, choose a stick and hold it up so students can see the name. This ensures that nobody gets forgotten, especially if you pause the game for a day or two. Teachers can also randomly pair students up using the sticks.
8. Table Colors
Naming tables or small groups by color is a big organizational helper. This way, you can dismiss students from the carpet by table color. Additionally, you can choose which table color is first to line up. If you pool supplies in a table basket, you can label the supplies with that color. So, everyone knows where the supplies go when found on the floor. This is such a helpful way to maintain organization in the classroom!
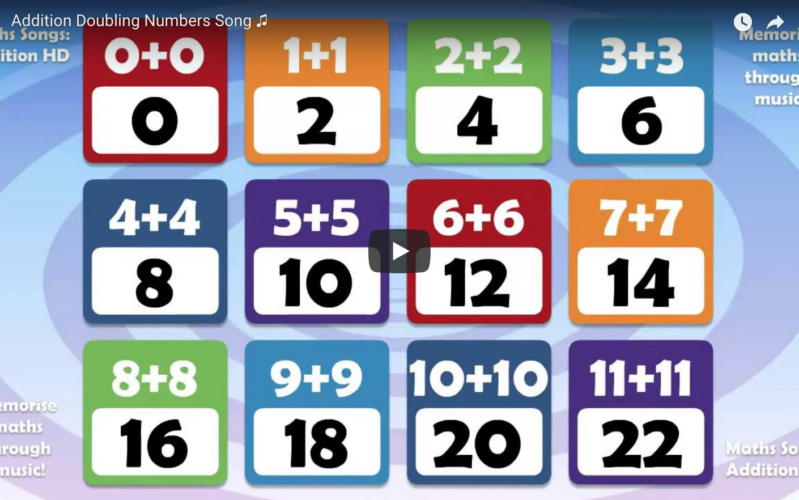
9. Videos
Consider starting group lessons with a video! For example, I have collected math videos that practice doubles or skip counting, and students chant along. I play these on the carpet when most students have already cleaned up and are coming to join us. Slow cleaners are more likely to speed up to join in because the videos are fun and engaging. It also gives me a few minutes to assist any students who need help or guidance. Best of all, it’s also great practice for math skills and a good warm-up!
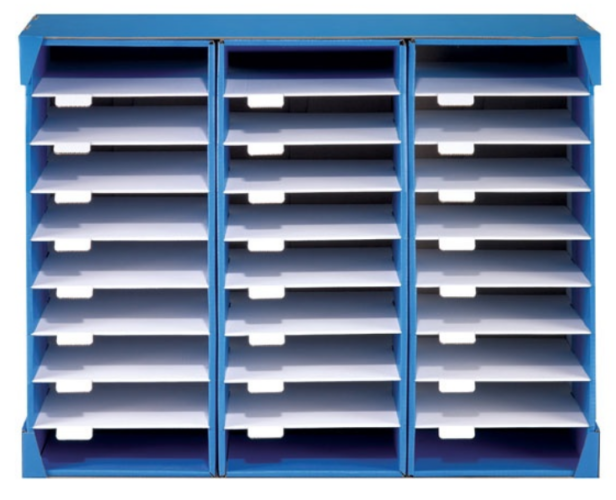
10. Student Mailboxes
There are always so many papers to hand out! Honestly, it can take a huge chunk of the day just to hand back worksheets. Thankfully, student mailboxes fix this. I fill them with so many items. This includes notices for absent students, returning student work that needs correcting, and student reward coupons. I also add notes that go home, signed planners, or anything I want to hand out. As added fun, students also write notes or letters to each other and hand out birthday invitations this way. They can do this independently, saving me a lot of time.
11. No-Name Systems
Students still forget to put names on the paper no matter how many reminders they receive. So, this strategy helps maintain organization in the classroom and saves time!
Ask students to highlight their name as they hand papers in or to attach a named paperclip to their paper. If this fails, you can dedicate a spot on your wall to hang papers with no name. The student clipboards in tip 2 also help ensure everyone has their name on the paper!
12. Attention Grabbers
Teachers would love for students to pay attention and focus all day. However, this is not the reality. Instead, teachers constantly work to gain the focus of all students. This is why attention grabbers are essential when finding ways to keep organization in the classroom!
When wanting students to FREEZE and listen to your instructions, there needs to be a consistent system in place. Importantly, it has to be loud enough so students can’t claim not to hear it! This could be a bell, an electric doorbell, a chime, or a call-back that students respond to. For instance, the teacher may say, “1-2-3-Eyes on me,” and the students answer, “1-2-Eyes on you!”
Additionally, you must ensure students STAY frozen until you finish talking. This works well by choosing a few “Best Listeners” to compliment or reward after you’re done talking. I also use a special word to let students know I am done. So, they learn to stay frozen until they hear that special word! Choose a word or phrase that is very uncommon, such as “thanks for freezing – back to work!” or “jellyfish.’
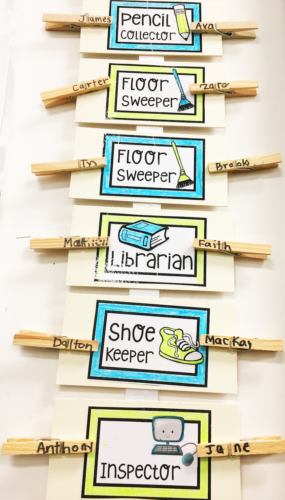
13. Clean-Up Tips
Learning can be messy! So, this causes scraps of paper and random supplies on the floor. Like most teachers, I assign a clean-up job to each student. However, I also assign a few students to be inspectors. Their job is to walk around afterward and ensure each job is done well. When cleaning up, I also ask students to put their coats and backpacks near their desks. This allows us to inspect the cloakroom area properly. Best of all, it helps ensure students take their lunch boxes and coats home!
14. Early Clean Up
Clean-up time can be absolutely exhausting! If the students and teacher are rushing around, nothing is getting completed, and people are going home frazzled. So, I decided to change the timing so that clean-up finished about 20 minutes BEFORE the end of the day! We stack chairs, clean up, and then meet on the carpet for a story, discussion, or game. When parents peek in, they see us engaged in quiet conversation on the carpet and wait outside. This is so much better than students rushing around to clean up. It also ensures we have enough time to do a proper clean-up job. Additionally, students are faster at cleaning because they love having extra time for a story or game at the end of the day. Some of our best class conversations happen at this time, and students leave the room relaxed and happy.
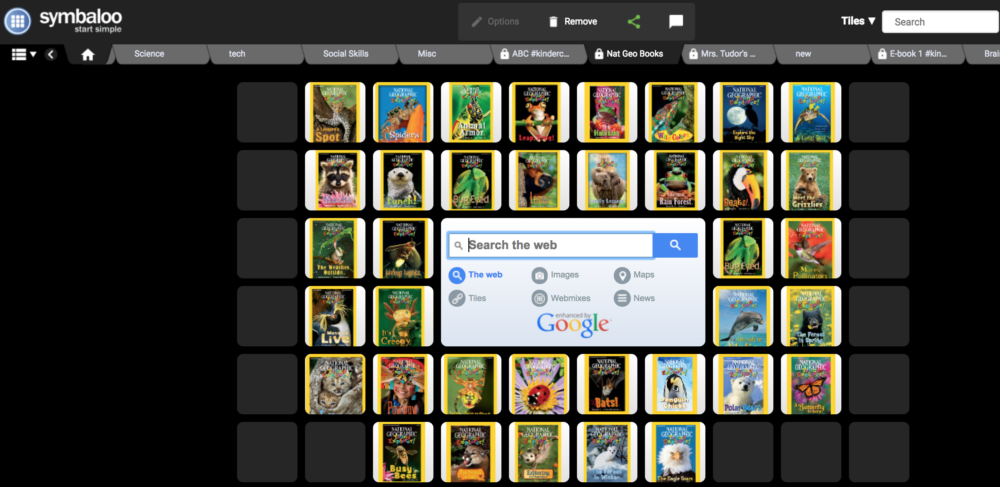
15. Symbaloo
I like to use a lot of online videos for math practice. Additionally, I use online stories, brain breaks, and phonics videos. It can be stressful to keep links organized, so I use an online bookmarking system called Symbaloo (www.symbaloo.com). The format is similar to an iPad, with icons you can click to go to any website. I have a different page for each subject, all displayed along the top as different tabs. To make a new bookmark, just click a blank square and enter the web address and title. That’s it! After that, whenever I click on it, the webpage will instantly open. This is a big time saver when I have students sitting in front of me. Another great feature is that it’s web-based so I can add icons at home, and they will appear within my account at school or on any computer. It’s completely free to use.
16. Garbage bins
While students often have the best intentions to clean up, it doesn’t always happen. So, while walking to the trash can, they may drop all their tiny pieces and create more work. Thankfully, this is no longer a problem with garbage bins! Each table has a bin for students to put all their scraps of paper after cutting. This is a lifesaver during art lessons or when doing interactive notebooks. The first student to finish the activity makes sure all scraps are in the bin, and they can dump the contents into the class recycling bin. They are also in charge of sweeping any scraps from under the table.
17. Whiteboards
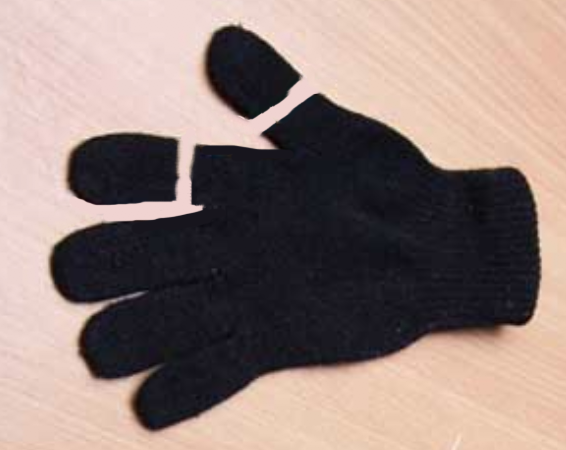
Teachers always want student engagement during lessons. Luckily, personal whiteboards have become a quick and easy way to increase engagement and excitement! At first, I avoided doing this because I thought it would be distracting and annoying to keep organization in the classroom. However, I simply ask students to grab a board and a marker as they sit down, and it goes smoothly! When I ask a question, students respond on their whiteboards and hold up their boards when I ask them to. This allows me to see what they are thinking.
I have two tips for this. First, I assign a student to check ALL the markers after the lesson to ensure the caps are on tight. Next, I cut the fingers off a few small black gloves so that each student has one “finger glove” to erase their board. These are small enough to toss into the same bin as the markers. Best of all, I only need a few sets of gloves to make enough for the whole class! They even last for years.
18. Brain Breaks
Students spend so many hours learning each day. Honestly, this makes them exhausted. Thankfully, brain breaks are popular to get students moving and ready for more learning. Admittedly, I was unsure if students would be able to calm down afterward. However, they do just fine as long as each student has an assigned spot in the classroom.
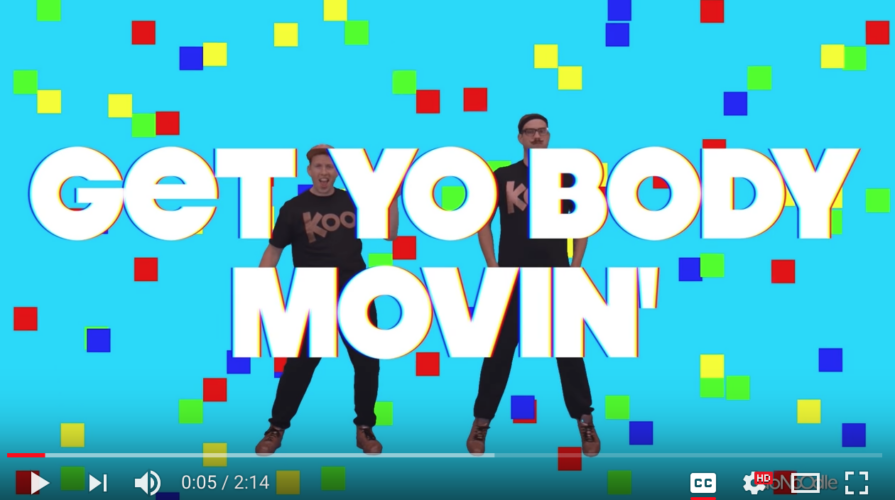
We used brain breaks to build stamina. At first, we worked silently for just 10 minutes. Sometimes, we had quiet music on. Then, we’d get a fun brain break using Go Noodle or Just Dance videos on YouTube. Soon, we built our stamina for 15 minutes. We eventually built up our stamina for up to 40 minutes.
Another tip: if students seem too revved up to focus, choose a quiet stretching, breathing, or yoga break. Go Noodle has many to pick from! Luckily, this helps everyone calm down together.
19. Alternative to Flexible Seating
Truthfully, I don’t have the budget to get rid of desks and buy new wiggle stools and other furniture for flexible seating. However, I did manage to give my students some great options with a limited budget! For example, a tall shelf by the window became a perfect standing desk. Additionally, an old bedside table in the corner became a private working space. Bath mats and clipboards became floor working spots. Laundry baskets with pillows inside became “private working boats.” These could all be tucked under tables when not in use so they didn’t cause extra clutter. Students loved these options!

20. Simplify the Classroom
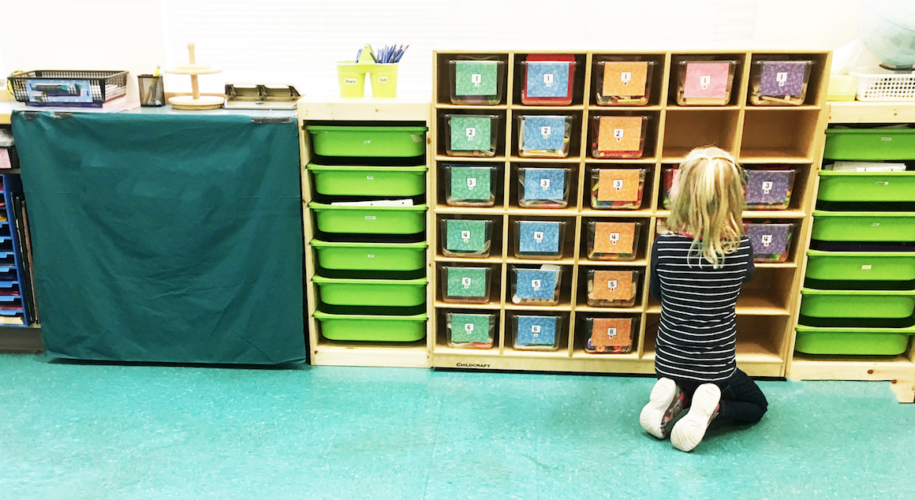
I recently removed a lot of things from my classroom walls. I felt that too much visual clutter and bright colors all over the walls might overwhelm the senses. So, I chose essential information to fill a focus wall and created a designated area for artwork. This left many areas as blank spaces so my students’ eyes could “rest.” I also had shelves full of games, books, and clutter and nowhere else to put the items. So, I made some “curtains’ ‘ by hanging a big piece of plain material over it. This way, I can easily access everything on the shelf, but it’s covered up and out of sight. A parent came in and said, “Your classroom is so clean!” and I said, “Thank you – but don’t look behind the curtain!”
Teaching is hard work. So, it is essential to share tips and suggestions to make the days go a bit smoother. Hopefully, these top 20 classroom organization tips will help your classroom! If you do not want to miss any of the upcoming lessons, join my email list to be notified of all the interactive lessons coming up! By joining the email list, you will receive freebies for blog exclusive subscribers!


 Art History for Elementary 1
  Crafty Math Bundle #1
  Directed Drawing With Differentiated Writing Prompts
  1st Grade Math Full Year MegaBundle
  The Ultimate Social Stories SEL Bundle
  Ultimate Sound Wall Bundle
  Fairy Tales STEM Literacy Bundle
  Secret Sentences Bundle

Is there a way to share your collection of videos you have saved in symbaloo?
Hi there! Yes, the directions for sharing a collection of links are outlined on this page: https://blog.symbaloo.com/symbaloo-the-basics/
If someone hasn’t made their collection public, then you can click each one you like to make your own collection manually.