I recently updated my classroom phonics posters to match my classroom decor. There was nothing wrong with them – I just wanted an update to match my new themes.
That got me thinking about ways I could use them to teach about phonics.
Here are some ideas I came up with in my classroom:
BE THE TEACHER CENTER
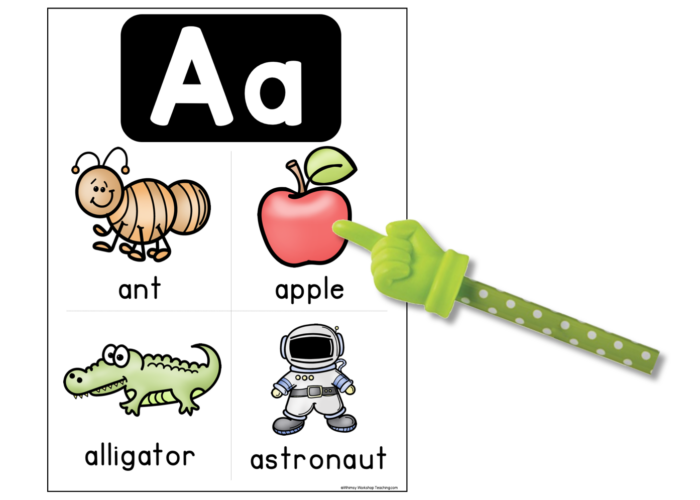
My students LOVE to be the teacher! One of my most popular centers is also the easiest to prep for. Students get a fancy hand pointer and a bin of phonics posters. One student pretends to be the teacher, and the rest are the students (and they take turns of course). The teacher gets to look through the bin of phonics posters and choose which ones the lesson will be about. She displays the poster for her “students” and uses the pointer to teach the phonics sounds and words using the pictures. It’s incredibly simple, but makes great use of the extra sets of phonics posters.
WRITING CENTER REFERENCE CARDS
Print your phonics posters out 1/4 size so they become Phonics Cards to use at your writing center. My students enjoy making their own copies of the posters to take home, or they can randomly choose a card as inspiration for story characters, setting, or other details for a story they are writing. Another thing they love to do is make their own little dictionaries using the cards as reference.

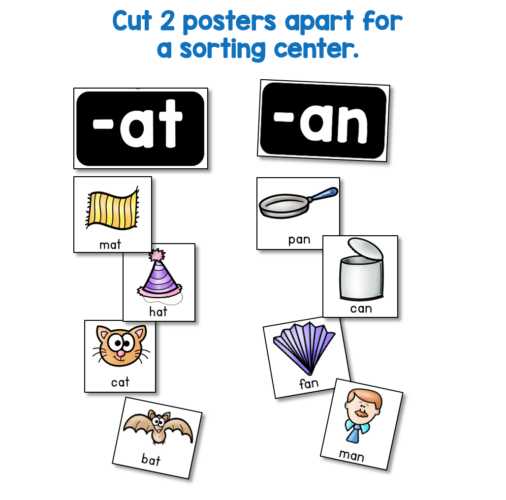
SORTING CENTERS
I cut my old phonics posters apart for students to use as a sorting center. For example, the poster for the letters A, B and C each had a header and four pictures with words underneath. I cut the pictures on each card apart on all three cards and tossed all the pieces into a basket. Students had to sort the correct pictures under each letter header. It also works well with Word Family posters, as shown below.
PUZZLE CENTERS
This one is similar to the one above, but each poster is cut into smaller, more random pieces to create a puzzle for students to put back together. Be careful not to cut too many pieces, or use too many posters at once, or it can become very challenging! I found this out the hard way!
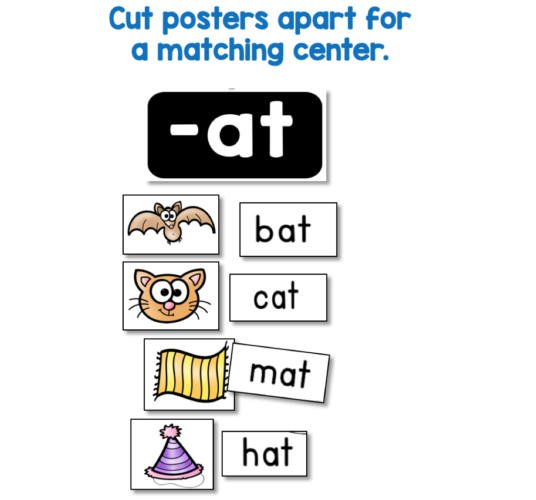
MATCHING CENTERS
My posters usually have pictures with words underneath. For example, the A poster had “Aa” at the top, and then four labeled pictures below. I cut the posters up so that the pictures and words were separate, and students had to match them back together. For younger students, I used only one poster at a time: four pictures and four words to match. For old students, you could use two or three cut up posters at once to differentiate.
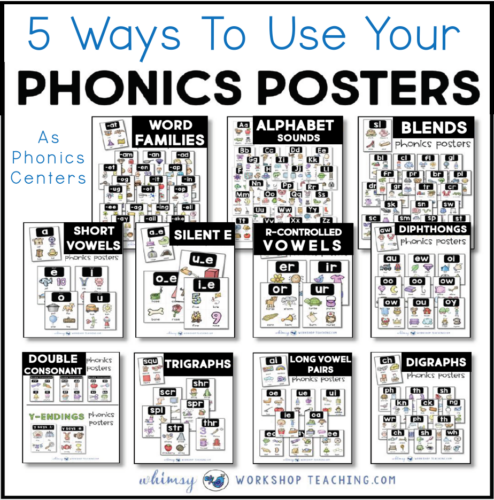
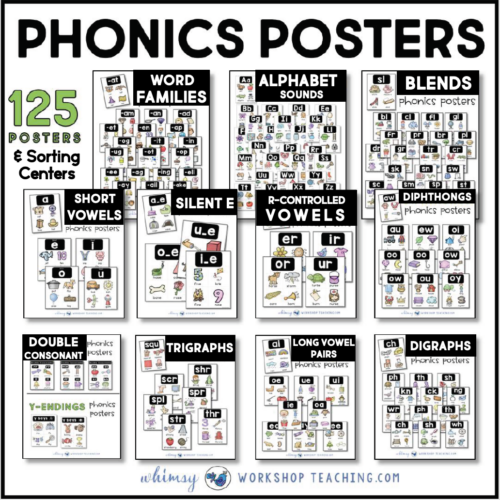
MY CLASSROOM PHONICS POSTERS
If you have posters similar to the ones pictured here, you can try some of these simple activities!
If you don’t have extra posters, you can take a look at the ones I am using in my classroom by clicking HERE.
You can download 2 free posters (featuring Y-Ending Words) to see the style and layout by clicking HERE.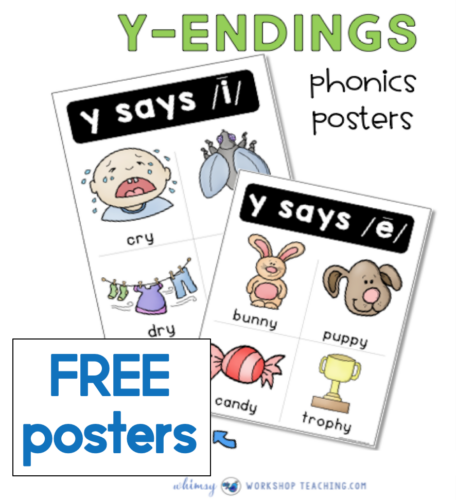
Do you have ideas about how to use your phonics posters?
Share them with us in the comments!

 Art History for Elementary 1
  Crafty Math Bundle #1
  Directed Drawing With Differentiated Writing Prompts
  1st Grade Math Full Year MegaBundle
  The Ultimate Social Stories SEL Bundle
  Ultimate Sound Wall Bundle
  Fairy Tales STEM Literacy Bundle
  Secret Sentences Bundle
